
The Benefits of Warming Up and Down, Drills and How to do them Effectively
 Karen Parnell
February 14, 2024
Karen Parnell
February 14, 2024
The Benefits of Warming up and Warming Down
Last year I saw many articles and blogs talking about how there is no need to stretch or warm up before a training session.
Many of the writers were inferring that stretching before exercise was damaging but neglected to point out that there are two types of stretching, one for before (Dynamic) and one for after (Static). Static or “stretch and hold” stretching before exercise is indeed not advised.
Static stretching before exercise can weaken performance, such as sprint speed, studies have shown. The most likely reason is that holding the stretch tires out your muscles. You should warm up by doing dynamic stretches or dynamic mobility, which are like your workout but at a lower intensity. Some athletes like to include dynamic moves that mimic the workout ahead and also use the warm up to increase their heart rate, build muscle activation and heat in other ways.
During the Olympics some triathletes warmed up on a turbo before their swim as their way to get their heart rate up and muscles primed to get active right from the gun!
The British Triathlon coaching team are experimenting with the theory that muscles store heat like batteries store power so warming up well will enable the body to stay warmer for longer in cold water starts until the athlete gets up to full racing speed.
For triathlon distances up to Olympic distance studies have shown a 3% improvement of performance after a good warm up and 79% showed improvements according to Laura Needham, Co-Head of Physiology at English Institute of Sport. So based on this it's well worth warming up!
For longer distances such as IRONMAN a long warm up will burn up glycogen and this will need to be replenished which is possible over the longer distances.
The warm up also prepares you mentally for the session ahead and has proven to help prevent injury plus it's thought to help with technique, skill and coordination.
Muscles like to work at 36 degrees Celsius and it's been proven that you can use more oxygen after a warm up. Temperature plays an important role in the way your muscles contract. It's a lot more difficult for muscles to contract in cold weather as opposed to warmer conditions. The temperature affects how easily oxygen is released from hemoglobin to the muscle. In colder weather, the rate that oxygen is released is slower.

Get your FREE 30-Day Mobility Challenge
Get some FREE resources including training plans here.
What should a warm up look like?
Ideally your warmup should include all of the basic primal movement patterns: Squat, Lunge, Push, Pull, Bend, Twist and Gait.
Examples of good dynamic warm up stretches / mobility movements are:
- Swimming
Arm swings, Hip Twists, and Dynamic Side Lat Stretches. You could even throw in some Burpees!
- Cycling
Leg swings, air squats, lunges, walking quad stretch, walking knee hugs, hip circles, lateral lunges and shoulder rolls.
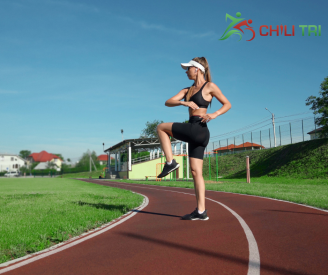
- Running
Ankle rolls, Lateral lunges, air squats, butt kicks, high knees, single leg dead lift, lateral leg swings, bent knee forward swing and hamstring sweep
These are not an extensive list but will give you some ideas of dynamic mobility movements. You should aim to warm up for at least 5-10 minutes.
Get your FREE guide to Running Technique
The Use of Drills in a Warmup
Along with dynamic stretches every workout should include drills and if you choose the correct ones can be a cheeky way to add in some strength, conditioning, flexibility, mobility and stability which is very important for triathlete’s and all endurance athletes but can fall by the wayside if you have a busy life schedule. According to Oli Williamson, Senior Physiotherapist British Triathlon, drills can be an important and effective way to inject more S&C in to your weekly training schedule. This is particularly important to gain robustness, elasticity and strength in the foot and ankle for running power.One drill he recommends is "ankling" which is good for speed loading.
The Ankling Running Drill
Get your FREE 30-Day Mobility Challenge
You can perform some very beneficial drill before your swimming, cycling and running.
Examples of swimming, running and cycling drills are:
Swimming Drills
Swimming drills are well known and accepted (you can see a full list of swimming drills here) and here are a few of my favourites and why you should do them:
6/1/6 or 6-Kick Switch: Helps develop your alignment, posture, and catch set up position while introducing a stroke. To do this do 6 kicks on the side with your head facing the bottom of the pool (superman), take one stroke and then rotate on to the other side, breathe and do 6 kicks on the other side. This is commonly done with fins. Try to keep your body at right angles to the bottom of the pool.
The 6-1-6 or 6-Kick Switch Swimming Drill
Get your FREE Swim Workouts for Triathletes E-book
Scull # 1: This drill improves your initial catch and feel for the water. Scull with both arms symmetrically just wider than your shoulders and back into the middle, changing angle of hands, keeping pressure on the water, fingertips about 30cm below surface and lower than wrist lower than elbow lower than shoulder, chin on the surface, with pull buoy to isolate your arms.
The Sculling Swimming Drill
New Doggy Paddle: This is a powerful drill for developing feel for the water and bent elbow catch, rhythm and timing plus keeping your hand in line with shoulder throughout catch and pull phase. Using a pull buoy, alternate the catch and pull strokes through to the hip, recovering underwater, extend and catch in line with your shoulder by tipping the wrist and bending your elbow, no pauses.
The Doggy Paddles Swimming Drill
For more details on Swimming Drills with Videos read the Blog on Swimming Drills
Cycling Drills
Kick & Pulls
The top and bottom of your pedal stroke are the toughest points to maintain tension in your drivetrain. Kick and pulls reinforce your ability to maintain tension through the weakest points in your pedal stroke.
To kick and pull, lightly kick your toes into the fronts of your shoes as your knee approaches the top of your pedal stroke. As you move through the pedal stroke and your foot approaches the very bottom of the circle, lightly pull your heels into the backs of your shoes almost like your scraping something from the bottom of your foot. To complete this drill, focus on the kicking motion for 30-60 seconds and then the pulling motion for an additional 30-60 seconds. When you feel good about both motions, combine them for an additional 30-60 second interval.
Get you FREE 31 Structured Indoor Cycling Sessions and Training Plan
Three Cycling Drills to Improve your Pedalling Efficiency
Isolated Leg Training (ILT) or Single Leg Drill
is another indoor cycling drill designed to help you balance out your pedal stroke and pedal more efficiently. Instead of focusing on the top and bottom of each pedal stroke, this drill has you home in on each individual leg to develop neuromuscular coordination.
Pedalling technique is often overlooked, with topics like power readings taking centre stage. But mastering pedalling technique can bring about many benefits. Whether you want to improve your FTP score by 10, 20 or 30 watts, improve your ability to climb, or increase your speed whilst putting out the same effort, an optimum pedalling technique can help you get there.
Isolated Leg Drill or Single Leg Drill for Cycling
Get your FREE 31 Structured Cycling Sessions and Training Plan
One-legged pedalling will primarily prevent you from compensating for an inefficient pedal stroke with your other leg and force you to both push and pull with the same leg at the same time.
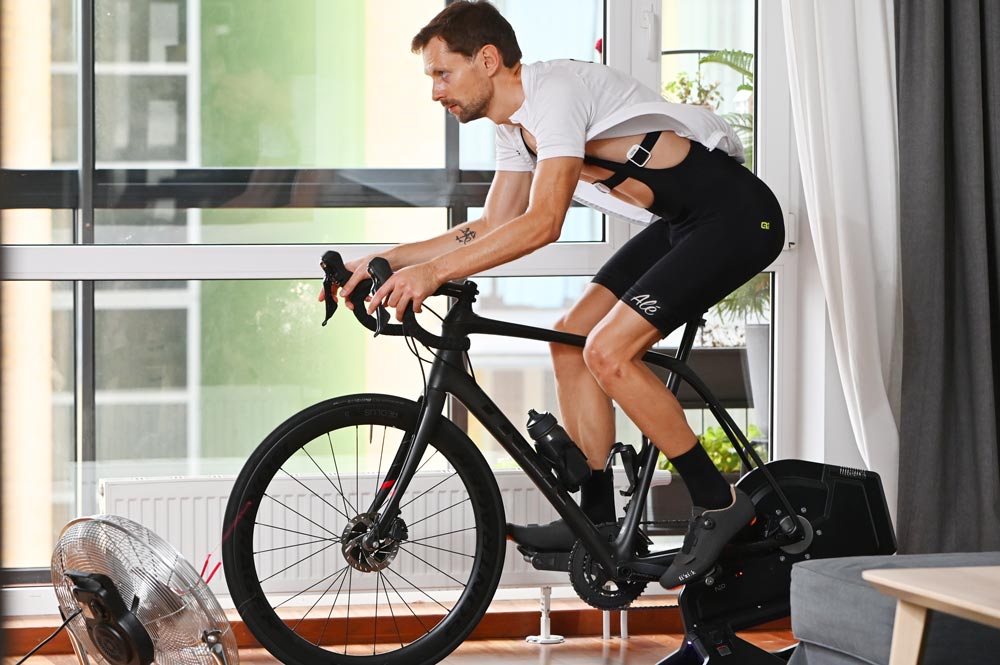
This type of drill can be done either out on the open road or on a turbo trainer, arguably working best on the latter.
To perform ILT drills, start by unclipping one foot. You can prop your foot up on a chair or leave it hovering away from your pedal. With the opposite foot still clipped in, start pushing the pedal. Begin with a low cadence and relatively low gear, focus on maintaining consistent tension through your pedal stroke. Don’t worry about power during this drill. Naturally, your power will be lower without the help of your other leg. Do this for between 30-seconds and 1-minute to start with. You may find if it’s your first time doing this drill that your pedal stroke will be quite clunky.
You may notice a dead spot in your pedal stroke signified by a knocking sound—typically at the top or bottom of the pedal stroke. Either slow down or focus on the kick and pull technique to maintain tension if this happens. Switch legs anytime your active leg feels very fatigued. As you progress with these drills, you’ll be able to push higher cadences.
Whilst you might find it difficult to perform a single revolution in a smooth fashion at first, stick with it and it won’t be long before you notice big improvements and start to reap the benefits. If there’s one leg that’s worse than the other, give more attention to that.
What’s great is that this kind of drill can be integrated into any ride, whether it’s a quick spin on the trainer or a long endurance ride. Try to do one or two sessions each week to maintain this ability and challenge yourself to extend the duration of each drill week on week.
Force Intervals
Force intervals are intended to help you generate power at a low cadence. To complete this drill, find a gear that still allows you to hit your target power while spinning a cadence between 50 and 60 pm. When doing this drill, focus on the top and bottom of your pedal stroke by kicking over the top and pressing your foot downwards. If you have any pain or issues with your knees, feel free to skip this drill altogether.
Get your FREE 31 Structured Cycling Sessions and Training Plan
Running Drills
High Knees:This classic drill accentuates the running position, which builds up your calves, hamstrings, and glutes with more power for a typical run. This drill also helps you turn over more quickly, increasing your speed, so High Knees are really great for both form and speed.
High Knees Running Drill
Get your FREE guide to Running Technique
Carioca or Grape Vine
Although a bit more complicated to get the hang of Carioca drills drastically improve your range of motion in the hips and between the arms and legs. As you cross your right foot in front of the left foot, shift the weight to the ball of your right foot. Once you move back to the starting position, cross the right foot behind the left, shifting the weight to the ball of the right foot.
Carioca or Grape Vine Running Drill
Knee drive to hip hinge (Arabesue)
This is great for single leg activation, ankle stability, glute activation and overall balance. Start on one leg and drive the other knee up to 90 degrees and balance. Then bend forward and drive that same knee backwards and extend out straight behind you. Your body should now be parallel to the ground and your leg out straight behind you. Stop for a 1-2 seconds then return to knee drive and step out forward. Swap legs and repeat, stepping forward every time. Do this for about 10m then jog back to the beginning.
Knee Drive to Hip Hinge Running Drill
For more details and videos of running drills read the Running Drills Blog.
You can put these running drills together plus a few more into a full running warm up routine like this one from Xterra triathlete Lesley Paterson:
Full Running Warm up with Drills
Get your FREE guide to Running Technique
Warming Down (Cool Down)
I like to use the term warm down rather than cool down as you ideally want to bring your heart rate down gradually to normal but never cold.
If you have had a particularly strenuous or high interval training session, then your heart rate will be very high so just stopping is never a good thing and in extreme circumstances could cause blood pooling. The warm down should last between 3 to 10 minutes and should be gradual and then include static stretches and you may choose to foam roller to help with muscle soreness.
A good example of a stretch routine after your run is from the run experience.
Foam Roller
Some athletes like to use a foam roller as part of their warm down to help with muscle soreness. There are many foams of foam roller, the most versatile one I have found that it light weight and great to take to the gym or races is hollow one like this foam roller on Amazon.
The benefits of foam rolling include:
- Relieves Muscle Tension
- Improves your Range of Motion
- Increased Blood Flow
- Speeds up Recovery
- Improves our Posture
- Reduces your Risk of Injury
This is a great follow along foam roller routine for cyclists.
Heel Raises or Calf Raises
Just like with the drills before our session we can throw in some small strength exercises to the end of our workouts to “stack” habits, so we never forget our strength work. I wrote about habit stacking in an article for TrainingPeaks.
One higher effective strength “snack” is heel raises at the end of a run. Training your calves is particularly important to build calf strength, endurance, and explosiveness. It's great for improving ankle stability and overall balance. Calf raises are also excellent for stretching the plantar muscles of the foot and making it more supple. If you have ever suffered from Plantar Fasciitis, you will know that anything that prevents this pain is a great thing.
Get some FREE resources including training plans here.
Calf raises are very simple, and studies have shown if you can complete 15 single leg raises on your left and right legs three times through your calf’s are “marathon ready”.
1. Calves raises stabilize your feet and ankle
Calf raises help in stabilizing your calves and feet–ensuring you have proper balance.
2. Your entire lower body performance depends on the strength of your calf muscles
Have you ever tried doing weighted squats and failed? Or have you ever felt muscle spasms in your lower body after doing even a little bit of cardio? Well, calf raises can help you do all that and more. Calf exercises can help heighten your lower body performance in leaps and bounds.
3. Runners, if you want to increase your speed then do calf raises
How light you are on your feet, how long your strides are, and how your foot lands on the ground–all these things are very important for running. Strong calf muscles–courtesy calf raises–can help you.
4. Calf raises help prevent injury
If you have ever run a marathon then there is no need to explain the aftermath of it. The soreness that you bear can be a little much–so much so that even doing basic things can be a problem. That’s why while you train for an event like this, you should do calf exercises before hitting the ground.
5. Calf raises are also good for your joints
Most of us report knee pain after doing just a few sets of burpees. And guess what? Your weak calves are the reason behind it. When you vertically jump and land while completing a burpee, it can impact your knee joints–especially if you don’t land properly. The same logic also applies to running on a treadmill.
How to do a Single Leg Calf Raise
Like the double leg calf raise, keep your feet pointing straight ahead, push up onto your toes as high as you can through your big toe more than the outside toes, using one leg at a time. If you roll out on your foot and ankle you will feel the outside of your calf work. When pushing through the big and 2nd toe your foot and ankle stay in a squarer position and you will feel the middle and inside of your calf more.
Keep your knee locked out straight. If front on to the table or wall lean more on the opposite hand. If side on use the opposite hand to lean and balance with. Feel the burn in the upper half of your calf (Gastrocnemius) in the middle not just the outside.
The next part of this exercise is to work the lower part of the leg by bending your knee roughly 30 degrees, which will activate your Soleus muscle more allowing you to feel the burn on the lower half of your calf.
A good friend of mine, Leo Wouters, who was one of the physical therapists at the 2020 Olympics in Tokyo for the marathon running teams said that you should never lower the heel lower than the floor, so I always advise not to do these on a step. His theory is that it can impact explosive power derived from the Achilles tendon when running.
Single Leg Heel or Calf Raise
Conclusion
As you can see there’s a lot of reasons to ensure you warm up and warm down properly and it can not only prepare you for your sessions, but you can add in some strength, mobility, stability and flexibility into your sessions for free!
Would you like a free training plan? Claim your free plan or e-book.
Karen Parnell is a Level 3 British Triathlon and IRONMAN Certified Coach, 8020 Endurance Certified Coach, WOWSA Level 3 open water swimming coach and NASM Personal Trainer and Sports Technology Writer.
Karen is currently studying for an MSc in Sports Performance Coaching at the University of Stirling.
Need a training plan? I have plans on TrainingPeaks and FinalSurge:
I also coach a very small number of athletes one to one for all triathlon and multi-sport distances, open water swimming events and running races, email me for details and availability. Karen.parnell@chilitri.com
Get your FREE Guide to Running Speed and Technique
Get your FREE Swim Workouts for Triathletes E-book
Get your FREE Open Water Swimming Sessions E-Book
Get you FREE 31 Structured Indoor Cycling Sessions and Training Plan
FAQ: Benefits of a warm-up and cool-down before and after a training session
What is a warm-up?
A warm-up is a period of light exercise or activity performed before the main training session. It aims to prepare the body physiologically and mentally for the upcoming workout or competition.
What are the benefits of a warm-up?
A warm-up provides several benefits:
- Increased blood flow: Gentle exercise increases blood flow to the muscles, delivering oxygen and nutrients while removing waste products.
- Improved muscle elasticity: A warm-up helps increase muscle temperature, making them more pliable and responsive to movement.
- Enhanced joint mobility: Warming up prepares the joints for movement, improving their range of motion and reducing the risk of injury.
- Mental preparation: A warm-up allows time for mental focus and concentration, helping athletes get into the right mindset for optimal performance.
- Activation of energy systems: Gradually increasing intensity during the warm-up helps activate the cardiovascular and energy systems, priming the body for higher intensity exercise.
What should be included in a warm-up?
A warm-up should typically include:
- Light aerobic activity: Engaging in light jogging, cycling, or dynamic exercises to gradually increase heart rate and body temperature.
- Dynamic stretching: Performing dynamic stretches that mimic the movements of the upcoming activity to improve flexibility and joint mobility.
- Sport-specific drills: Incorporating drills or exercises specific to the activity or sport to activate the relevant muscles and movement patterns.
What is a cool-down or warm-down?
A cool-down, also known as a warm-down or post-exercise recovery, is a period of gentle exercise or stretching performed after the main training session. It helps the body transition from intense activity to a resting state.
What are the benefits of a cool-down?
A cool-down provides several benefits:
- Gradual recovery: A cool-down helps facilitate a gradual transition from exercise to rest, allowing the body to gradually lower heart rate and cool down.
- Removal of waste products: Gentle exercise and movement during a cool-down help promote blood circulation, aiding in the removal of waste products like lactic acid.
- Reduced muscle soreness: Cooling down may help alleviate muscle soreness and stiffness experienced after intense exercise.
- Enhanced flexibility: Incorporating static stretching during a cool-down can help improve flexibility and maintain or improve joint range of motion.
- Mental relaxation: The cool-down phase allows for mental relaxation, helping athletes unwind and promote a sense of well-being.
What should be included in a cool-down or warm-down?
A cool-down should typically include:
- Low-intensity activity: Engaging in low-intensity exercises such as slow jogging or walking to gradually decrease heart rate and promote blood flow.
- Static stretching: Including static stretches that target the major muscle groups to enhance flexibility and promote relaxation.
How long should a warm-up and cool-down last?
The duration of a warm-up and cool-down can vary based on individual needs and the intensity of the training session. As a general guideline, aim for a warm-up of 10-15 minutes and a cool-down of 5-10 minutes. Adjust the duration as necessary to ensure the body is adequately prepared and given sufficient time to recover.
Remember, incorporating a warm-up and cool-down into your training sessions can optimize performance, reduce the risk of injury, and promote overall recovery. Tailor your warm-up and cool-down based on the specific demands of your sport and consult with a qualified coach or trainer for personalized guidance.
References
Effects of prior warm-up regime on severe-intensity cycling performance
#warmup #warmdown #cooldown #triathlon #chilitri #running #swimming #cycling #triathloncoach #traithlontrainingplans #swimmingtrainingplans #runningtrainingplans